- Posted December 10th, 2019
*** This article is being depreciated as the lambda function on the back end leverages the Azure AD graph api. Microsoft will stop supporting this endpoint as of June 30th, 2022. While this method still works, we suggest you refer to our other blog article on this that leverages the graph api. This article can be found at the following link: ***.
USING AZURE AD AS AN IDENTITY PROVIDER FOR AWS TRANSFER (SFTP) | V2
Using Azure AD as an Identity Provider for AWS Transfer (SFTP)
AWS Transfer for SFTP enables you to easily move your file transfer workloads that use the Secure Shell File Transfer Protocol (SFTP) to AWS without needing to modify your applications or manage any SFTP servers. Out of the box you can easily allow for certificate based authentication, however tying into another validation mechanism can be a bit cumbersome. AWS SFTP now supports custom identity providers, however it us up to you to create the backend logic for authentication and policy creation.
The high level concept
We are going to use AWS Transfer for SFTP with a custom authentication configured to allow uploading to S3 via SFTP using Azure Active Directory credentials. We will also validate the end user is a part of a specific security group. If both authentication and group validation is true, we will grant access to the S3 bucket via AWS Transfer for SFTP.
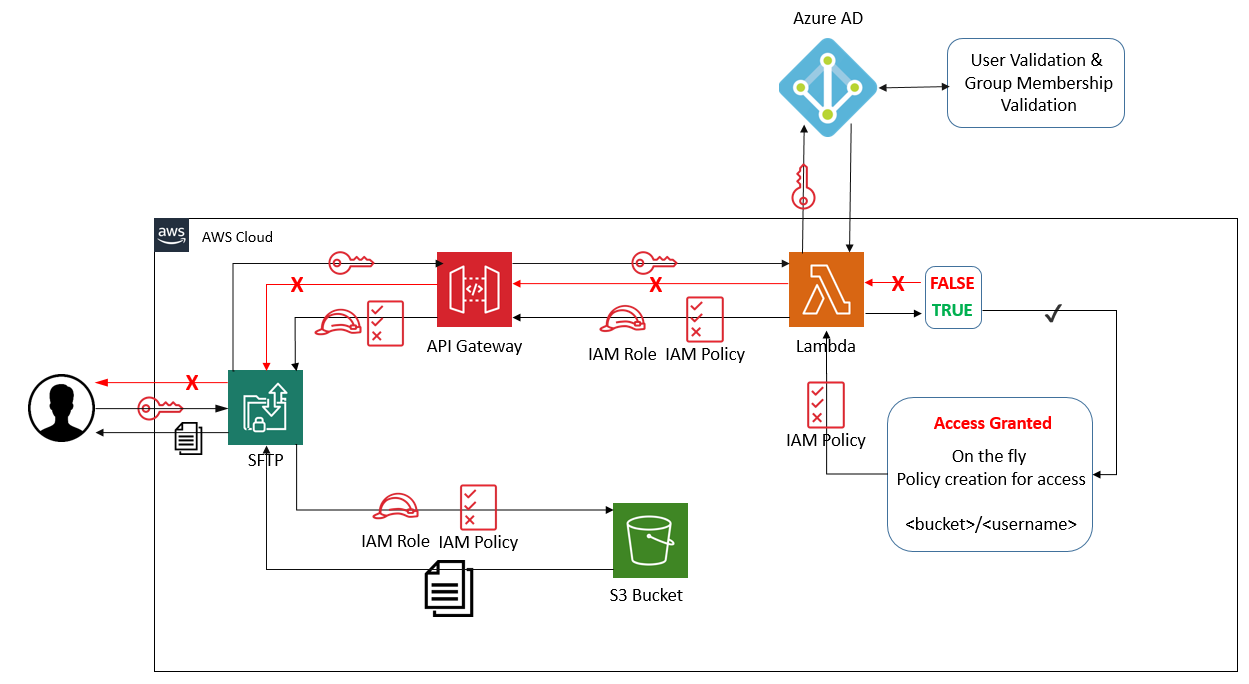
We have the following steps involved:
- User initiates an SFTP transfer
- AWS Transfer for SFTP then sends the login request to the AWS API Gateway
- AWS Lambda function recieves the UserName and Password from the API Gateway invocation
- AWS Lambda function calls the Azure AD API call to validate the UserLogin and then Validates that the user is a part of the specified Security Group
- If both Authentication and Group Membership returns true, then the function continues to build our custom IAM Policy for the specified user
- the AWS Lambda function returns the specified IAM Role as well as a custom Scoped Down IAM Policy
- End user now has access to upload and download files and create new directories in the specified directory: MY_BUCKET/USER_NAME
Setting up the IAM Role for S3 Access
- Sign into the AWS console and navigate to IAM: https://console.aws.amazon.com/iam
- Go to Policies in the navigation pane and select Create policy then select the JSON tab:
- Paste in the following JSON code into the editor window and select Review policy
{
    "Version": "2012-10-17",
    "Statement": [
        {
            "Sid": "ListBuckets",
            "Effect": "Allow",
            "Action": [
                "s3:ListAllMyBuckets",
                "s3:GetBucketLocation"
            ],
            "Resource": "*"
        },
        {
            "Sid": "ListSftpBucket",
            "Effect": "Allow",
            "Action": [
                "s3:ListBucket"
            ],
            "Resource": [
                "arn:aws:s3:::MY_BUCKET_NAME"
            ]
        },
        {
            "Sid": "AllowFtpWriteOptions",
            "Effect": "Allow",
            "Action": [
                "s3:PutObject",
                "s3:GetObject",
                "s3:DeleteObjectVersion",
                "s3:DeleteObject",
                "s3:GetObjectVersion"
            ],
            "Resource": [
                "arn:aws:s3:::MY_BUCKET_NAME/*/*"
            ]
        }
    ]
}
- Name your policy and select Create policy
- Go to Roles in the navigation pane and select Create role:
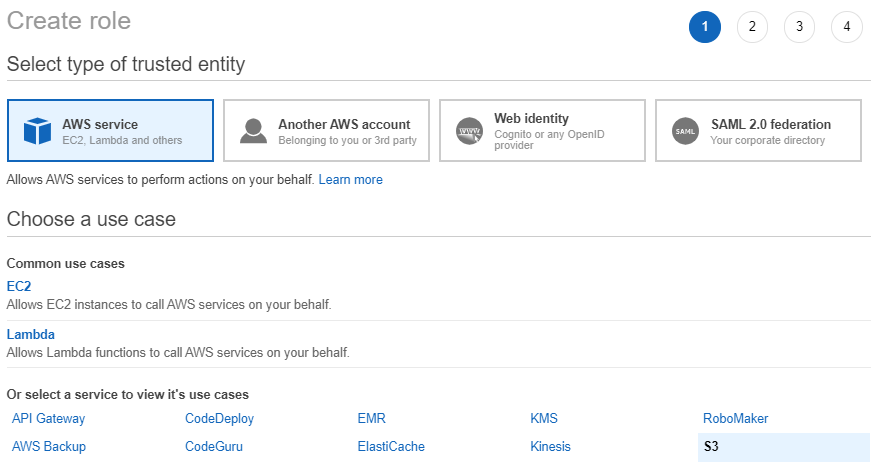
- Select AWS service and then select S3 and press the Next: Permissions button and filter for the policy that you created in the previous step
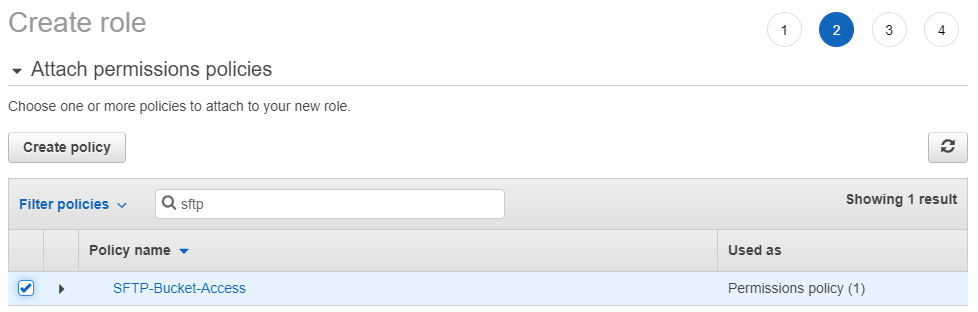
- Select Next: Tags and then select Next: Review. Create a unique name for your Role and select Create role
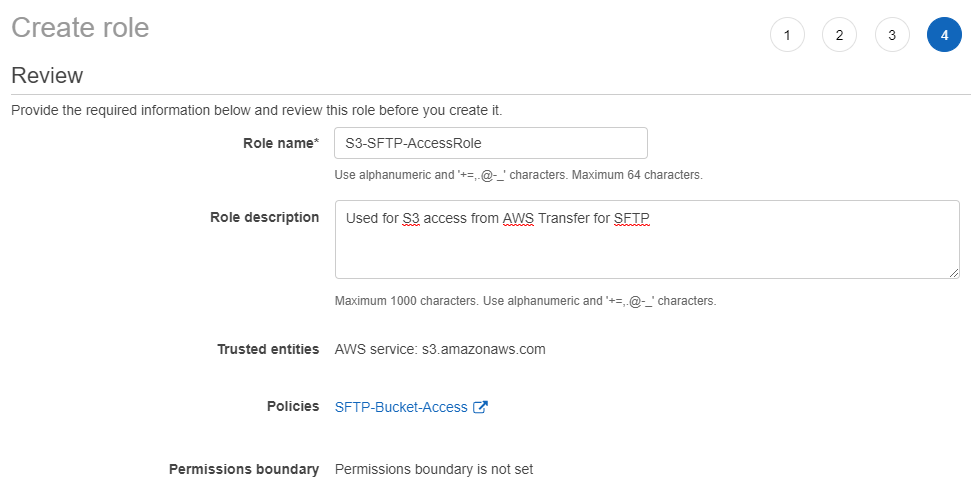
- Search for the role that you have just created, and select it. Once inside the role copy the Role ARN as we will use that when deploying our CloudFormation template. Select the Trust relationships and paste in the following JSON document:
{
  "Version": "2012-10-17",
  "Statement": [
    {
      "Effect": "Allow",
      "Principal": {
        "Service": "transfer.amazonaws.com"
      },
      "Action": "sts:AssumeRole"
    }
  ]
}
and select Update Trust Policy.
We will set more restrictive permissions in our
Scoped Down IAM Policy which will be specific to each user that is logging in.
Setting up the API Gateway
- Create an AWS CloudFormation stack from the sample template found at the following Amazon S3 URL:
https://ldaptive-pubic-downloads.s3.amazonaws.com/s3-sftp-api-gateway-setup.template
This template generates a basic API Gateway and AWS Lambda function.
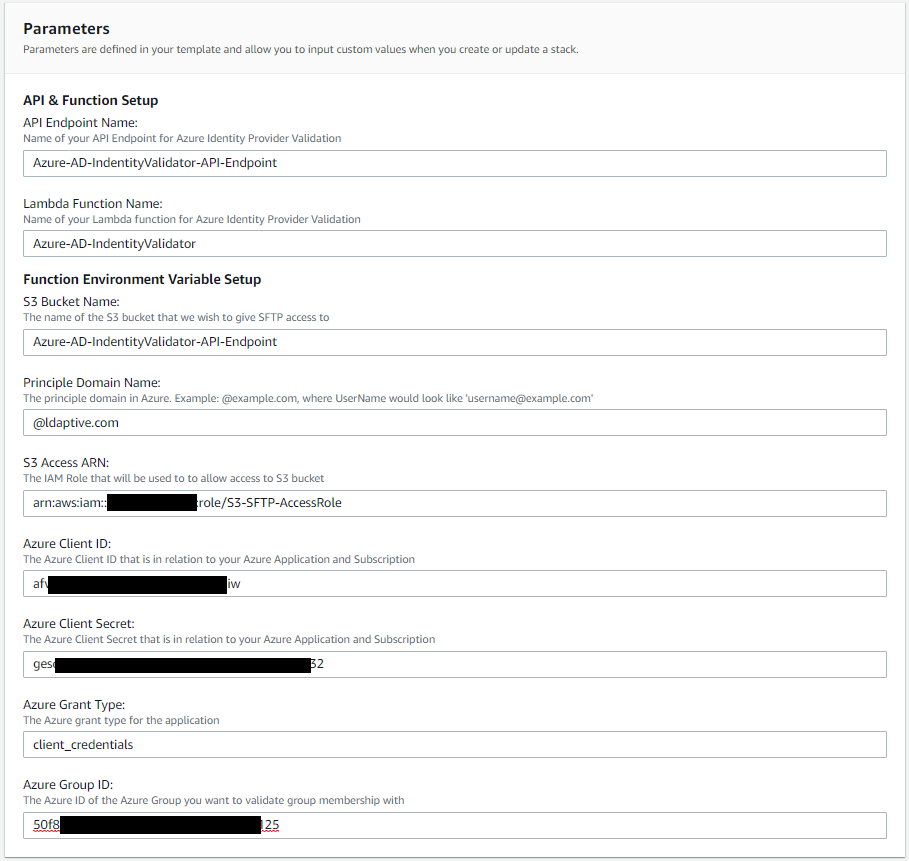
Deploying this stack is the easiest way to integrate a custom identity provider into the AWS SFTP workflow. The stack uses the AWS Lambda function to support a gateway based on API Gateway. You can then use this gateway as a custom identity provider in AWS SFTP. By default, this lambda function just validates that the username and password is being passed to the function. This will return a response similar to what the final lambda function will produce. - Fill in the parameters for the cloud formation template. This will all needed IAM Roles and IAM Policies as well as API Gateway and lambda function and set the environment variables that will be used with our final version of the Lambda function.
- Check that the API gateway is working and is invoking the lambda function as expected.
To do this, open the API Gateway console at https://console.aws.amazon.com/apigateway and view the Transfer Custom Identity Provider basic template API that the AWS CloudFormation template generated. Navigate to to the Resources in the navigation pain, the select GET method listed here. The following screenshot shows the correct configuration as well as how to test this function. Select the TEST option on this dialog page. 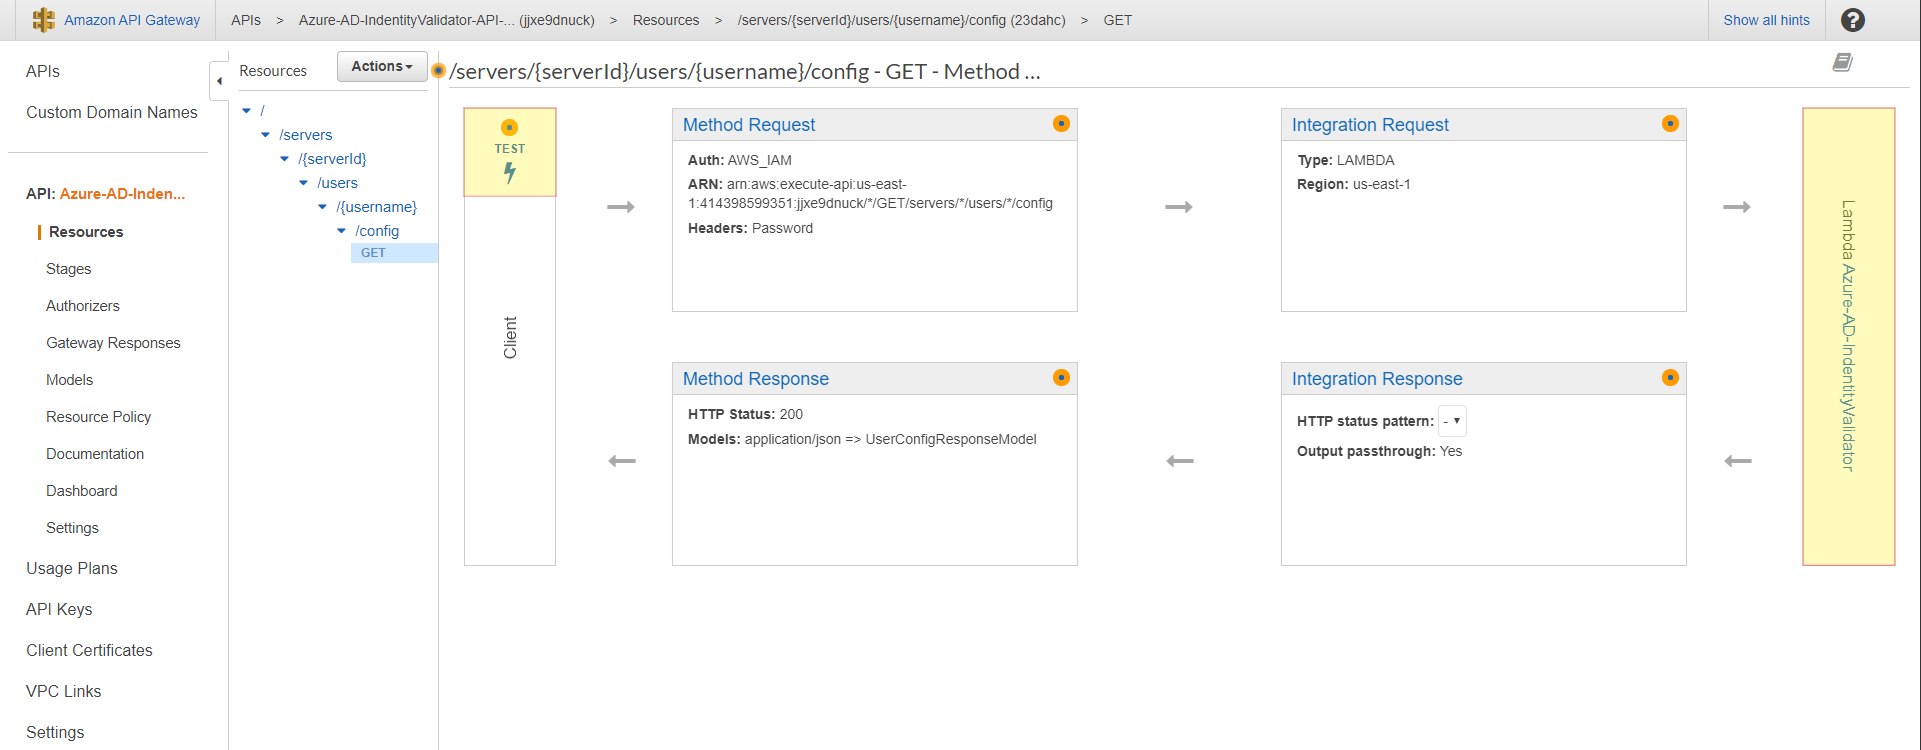
The following screenshot shows the response that you would expect back from the lambda function if the invocation was successful. 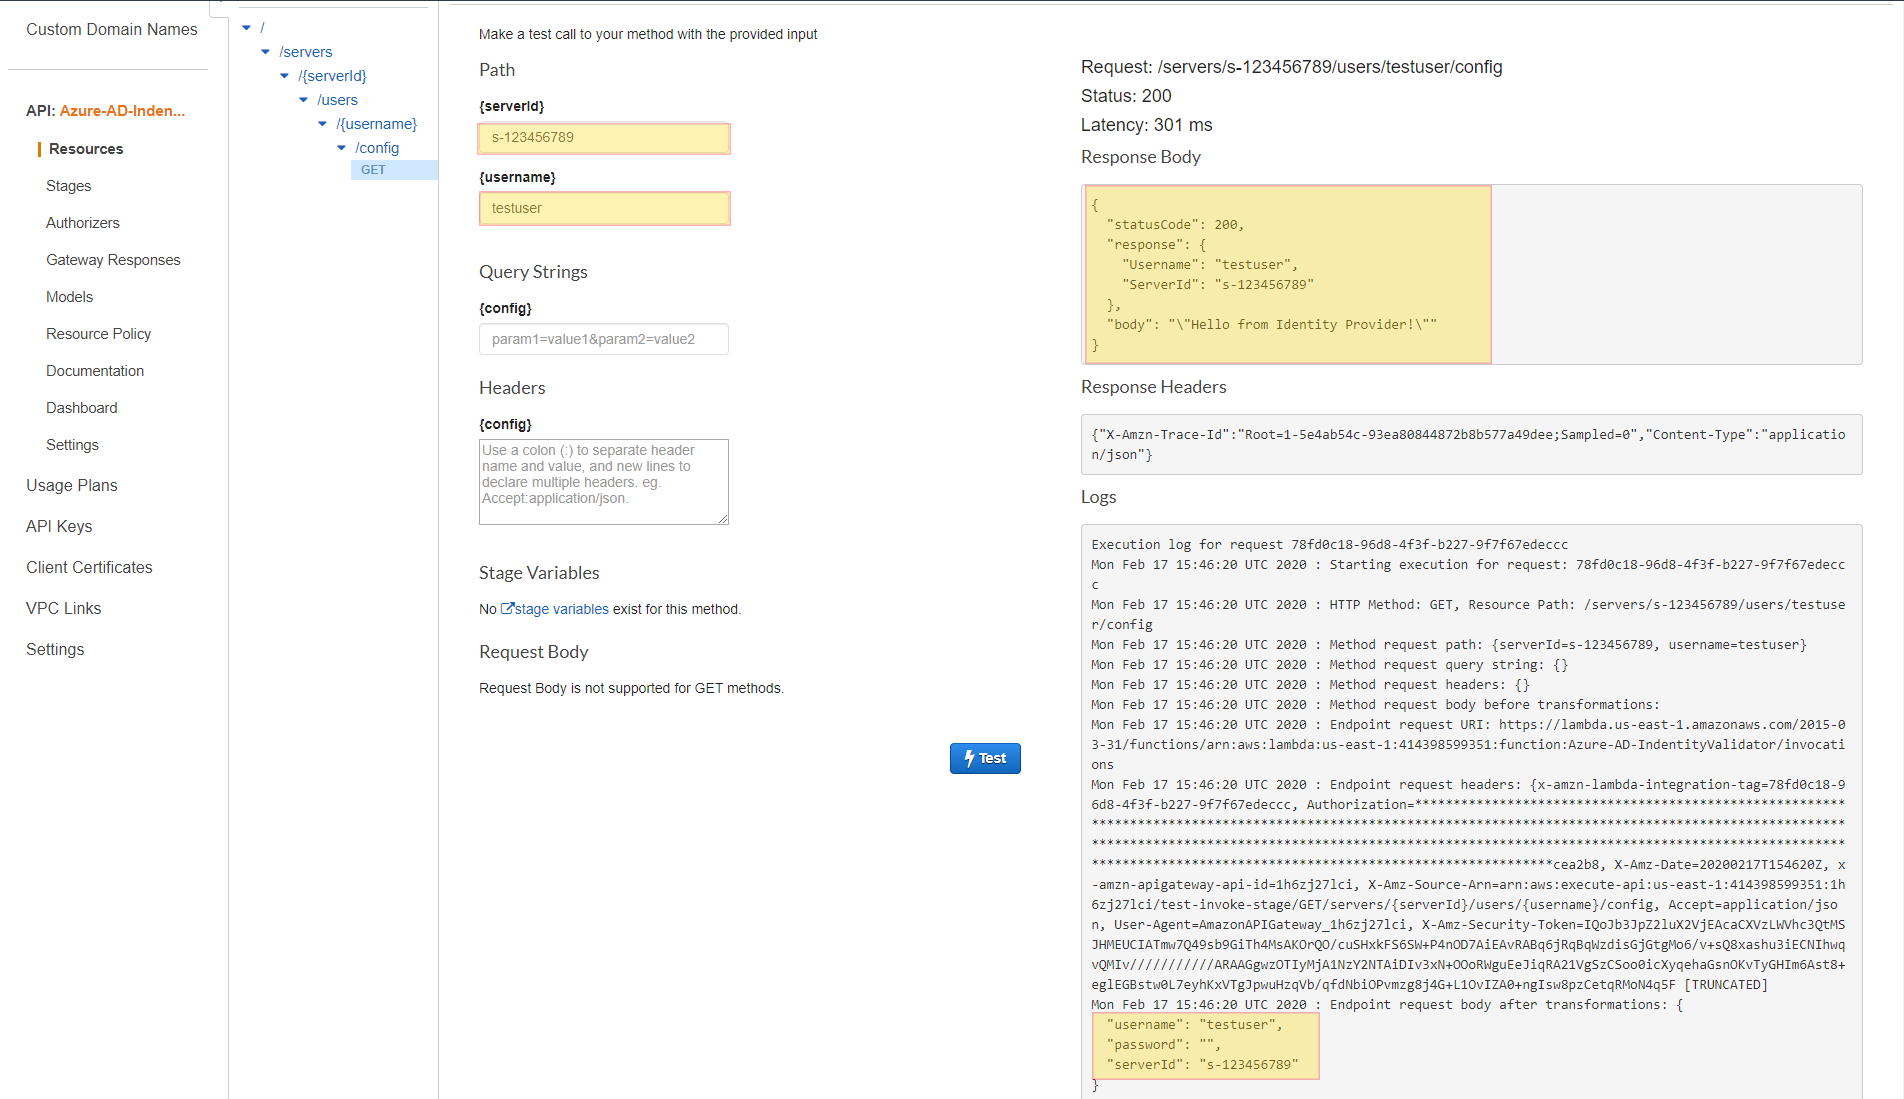
Setting up the AWS Transfer for SFTP Server
- Navigate to AWS Transfer for SFTP: https://console.aws.amazon.com/transfer and select Create server.
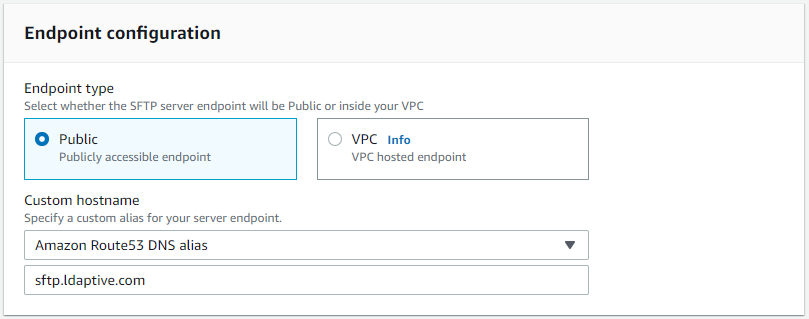
- Under Endpoint configuration select Public.Optional: we will create a Custom hostname here leveraging Amazon Route53 DNS alias since our domain is hosted with Route53.
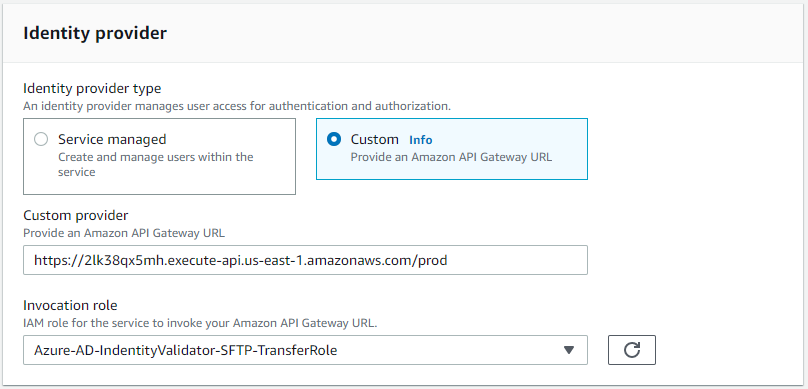
- Under Identity provider select Custom and in the Custom provider paste the prod stage invocation URL that we was created under the steps Setting up the API Gateway. For the Invocation role select role that was created via the CloudFormation template: Azure-AD-IdentityValidator-SFTP-TransferRole.
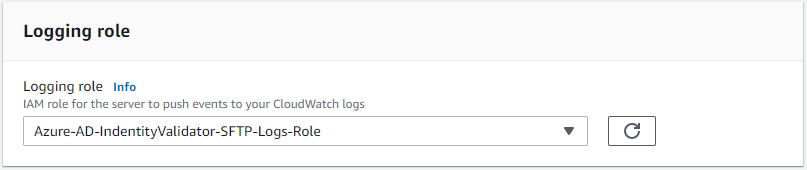
- Under Logging role select the role that was created via the CloudFormation template: Azure-AD-IdentityValidator-Logs-Role. Then select Create server.
Understanding the Lambda Function
- Clone the git repo at the following link: https://github.com/ldaptive/aws-s3-sftp-azure-IdentityProvider
- Navigate to the folder where you downloaded the repo to and run npm install
- Go into the root of the directory and create a .zip file with all of the files and folders in order to upload to your lambda function.
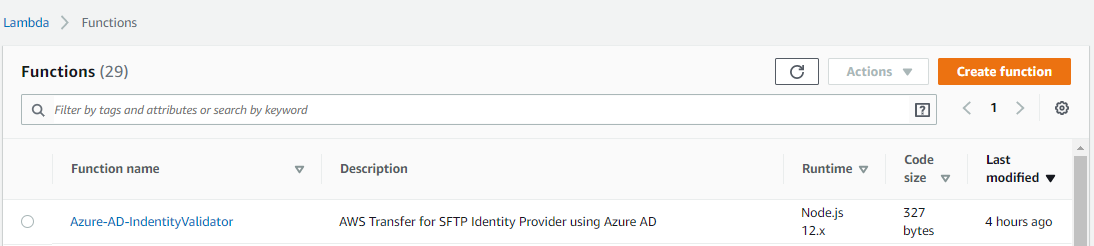
- Navigate to Lambda: https://console.aws.amazon.com/lambda and locate the function that was created by our stack. In this example, we kept the default Lambda name of Azure-AD-IdentityValidator.
- Select the function to enter the function edit pane. Navigate to the Function code section. Change the Code entry type to Upload a .zip file then press the Upload button. Navigate to where you downloaded the Function .zip file and select the function for upload. Now save the function.

Conclusion
This is just an example on how to setup authentication with Azure AD and leverage group membership validation. There are many different use cases, weather leveraging Read Only or Write access, or being able to better direct who has access to what files. Our use case for creating this dealt with several hundred users needing to be able to access data specific to them and provisioning local access keys was not a viable solution nor did it pass rigorous audit checks due to the nature of the data. We also gained insight into what a user is doing what with data by logging all file access to cloudwatch and thus not requiring a separate CloudTrail for this bucket.